 |
Phase Transitions |
|
|
Phase Transitions |
Phase Transitions
Powder diffraction is an ideal tool for the study of phase transformations. Different phases may occur due to changes in temperature, pressure, or even chemical synthesis. The previous page showed an example of phase transformation on cooling, where the higher- and lower-temperature phases are clearly related. Not all phase transitions are of this type, e.g. ice changing to water.
Solid-solid phase transformations may be broadly classified into two classes: first-order, which tend to be of a reconstructive nature in terms of the crystal structure, and second-order, which tend to be more of a displacive nature. Although powder diffraction is very useful in monitoring first-order transitions, the major differences in crystal structures between the phases means that it is difficult to use the structural information obtained from one phase for the refinement of the second. By contrast, if the transition does not involve reconstruction of the crystal, the unit cells of both phases are often related, but their space-group symmetries will differ. Often the symmetry change will involve in going from one crystal system to another (e.g. cubic to tetragonal or orthorhombic to monoclinic).
Given the structure of one phase involved in a second-order type transition, the first step in the analysis of the second phase will be to relate the the unit cells between the two phases. If the unit cells are related, then the lines in the powder diffraction pattern are also related. This is demonstrated as follows:
 |
Cubic |
|
 |
Tetragonal |
|
 |
Orthorhombic |
|
 |
Rhombohedral |
The top diagram above represent possible diffraction lines from a cubic material with an 8 Å unit cell, which transforms to a phase of lower symmetry on cooling. The next three diagrams show possible diffraction lines for a similar unit cell, but with a distortion to tetragonal, orthorhombic, and rhombohedral distortion, respectively. The splitting (or non-splitting) of the lines in the pattern are indicative of the change in symmetry as follows:
Cubic → Tetragonal.
Cubic → Orthorhombic.
Cubic → Rhombohedral.
The following practical example shows how this approach might be carried
out in practice. The data sets show below correspond to two different phases
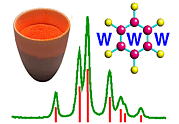
of a zirconium salt, the lower of which (shown in magenta) can be
indexed as body-centred tetragonal with
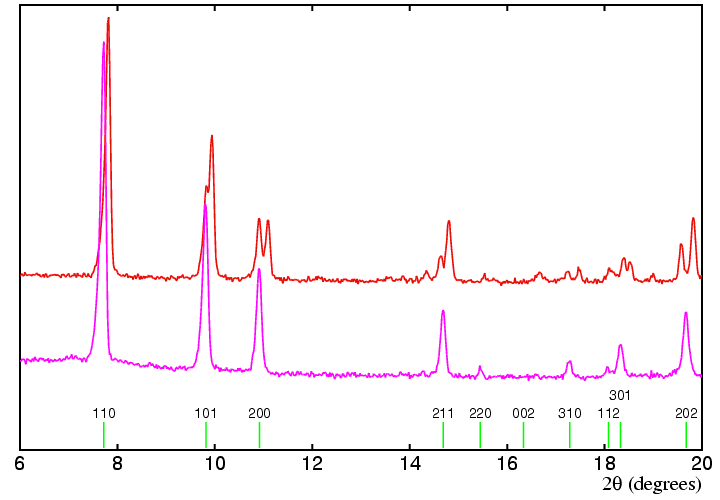
Assuming that the two phases have similar structures (and this seems likely given the relative intensities of the peaks), then we can examine how the various tetragonal peaks split to form the phase shown in red. The 200 peak splits into two peaks of approximately equal intensity, which we may index as 200 and 020 if the unit cell is of similar dimensions in each phase. Note that this assignment is valid irrespective of the symmetry of the second phase. By contrast, the first reflection in each pattern appears to be a single peak, so we may index this as 110 also in the second phase. This implies that the angle γ is 90°. Both 101 and 202 reflections split in a similar way, with the bigger splitting being observed for 202 as expected: we might be tempted to say that the indices of the split peaks are 101 and 011, and 202 and 022, respectively. This type of symmetry splitting would be consistent with a tetragonal to orthorhombic phase transition. However, note what happens to the 211 reflection: it seems to split into 3 peaks. The latter is not possible if the second phase is orthorhombic, but can occur if it is monoclinic. A more detailed analysis of the data set shown in red confirmed that this was indeed the case.
Discovering the relationship between two phases is only the first step towards refinement of the structure of one phase given the structure of a related one. The second step is finding the relationship between the atoms of, say, the higher-symmetry phase and those of the lower-symmetry phase. In some cases, it may just involve atoms in special symmetry positions changing to a less-symmetrical or general position, e.g. 0.5,y,z going to x,y,z, where x ≈ 0.5. In other cases, it might result in, say, 8 symmetry-equivalent atoms in the higher-symmetry unit cell becoming two groups of 4 symmetry-equivalent atoms in the lower-symmetry unit cell.
One of the major pitfalls in refining a lower-symmetry structure by the Rietveld method using a starting model based on a higher-symmetry phase is pseudo-symmetry leading to either an unstable or singular least-squares matrix. Under these conditions, it is advisable to add parameters slowly to the refinement process, rather than "tossing the whole lot in at once".
| © Copyright 1997-2006. Birkbeck College, University of London. | Author(s): Jeremy Karl Cockcroft |